Laser cutting and engraving wood is a popular and satisfying use for laser machines. The process uses a focused laser beam to either cut through wood or engrave detailed designs by burning or vaporizing the wood’s surface. Here’s a step-by-step guide to both techniques:
¶ Step 1: Choose the Right Wood
For Engraving: Softer woods like basswood, alder, poplar, and birch usually give good contrast and detail when engraved. Hardwoods such as maple, cherry, and walnut also engrave beautifully but may need higher power or slower speeds. Different woods produce various shades of brown or black when engraved, depending on their composition and sap content. Plywood often yields less consistent results because of glue layers and varying wood quality.
For Cutting: Softer woods and thinner plywoods (like birch plywood, MDF) are easier and faster to cut. Hardwoods and thicker materials require more laser power and slower speeds, potentially leading to more charring.
Flatness: Ensure your wood is as flat as possible. Warped wood can cause uneven focus, leading to inconsistent cuts or engravings. Use clamps or magnets to keep the wood secure if needed.
Knots/Imperfections: Avoid knots or major imperfections since they can react unpredictably to the laser, resulting in uneven engraving or even small flames.
Explore our wood collection here.
¶ Step 2: Prepare Your Design
1. Software: Use graphic design tools like Adobe Illustrator, CorelDRAW, Inkscape, or your laser’s native software such as LightBurn or RDWorks to create or import your design.
2. Vector vs. Raster:
- Cutting: Designs must be vector paths (lines and shapes) with a very thin stroke, as the laser follows these paths to cut.
- Engraving: Designs are usually raster images (photos or solid fills). The laser “scans” across the image, burning dots onto the surface to create the engraving.
3. Optimization: Ensure your design is laser-ready: no overlapping lines for cutting (unless you want a double pass), clean vector paths, and high-resolution raster images for sharp engravings.
Looking for design ideas? Explore our project ideas.
¶ Step 3: Prepare the Wood Surface (Optional but Recommended)
Sanding (for Engraving): Lightly sand the wood surface with fine-grit sandpaper (around 220 grit) to smooth out any imperfections. This helps the laser create cleaner, more consistent engravings. Be sure to remove all dust after sanding.
Masking (for Cutting and Engraving): Apply transfer tape or painter’s tape to both sides of the wood, especially for cutting. This protective layer absorbs most of the smoke and char, keeping your wood cleaner. After finishing, simply peel off the tape for a neat finish. Masking is highly recommended for the best results.
¶ Step 4: Set Up Your Laser Machine
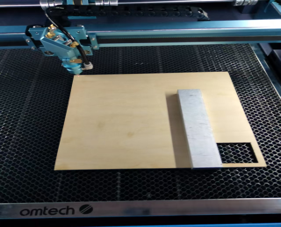
1. Place the Material: Secure your prepared wood firmly on the laser bed using clamps, magnets, or a jig to prevent any movement during the job.
2. Focus the Laser (this step is crucial):
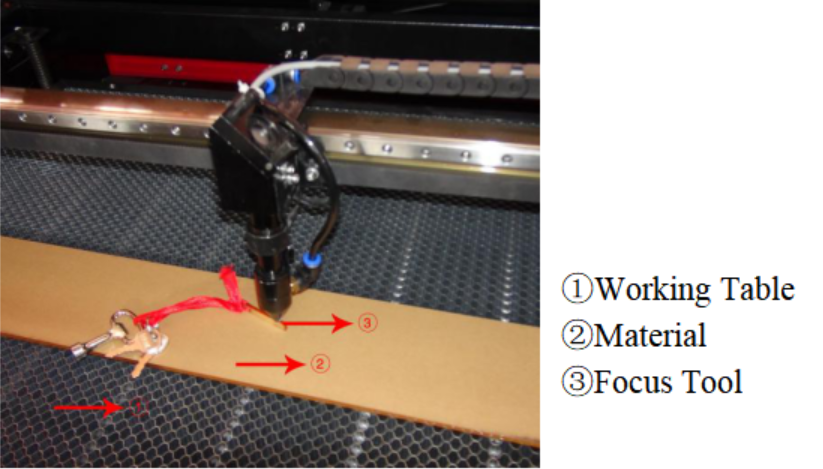
- Manual Focus: Use the provided focus gauge (usually a small acrylic block or tool) to set the correct distance between the laser head and the wood surface. Adjust the bed or laser head height until the gauge just touches both surfaces.
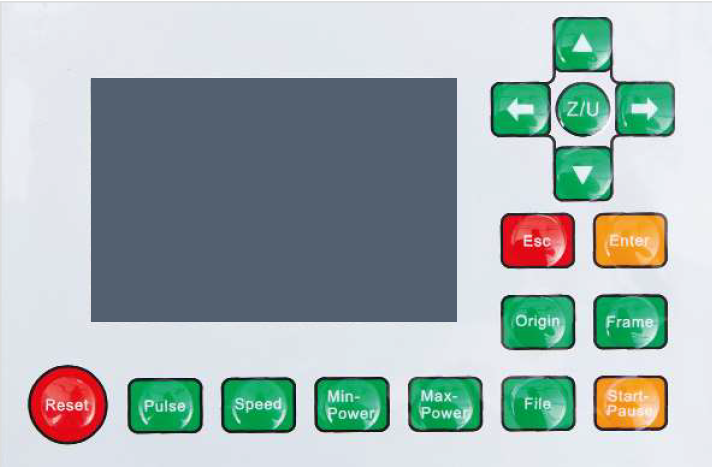
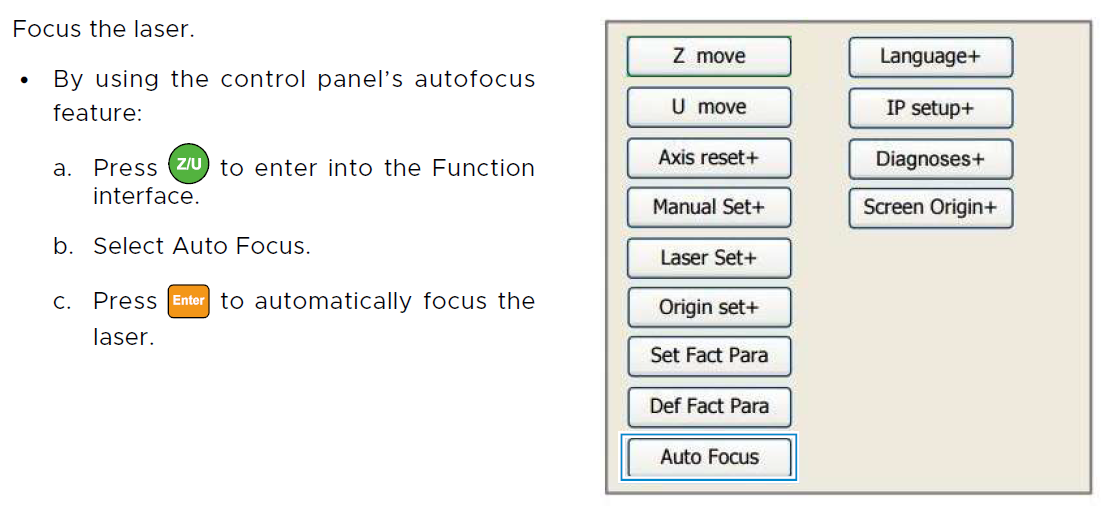
- Autofocus: If your machine has an autofocus feature, activate it through the control panel or software. Follow the on-screen instructions or the guide below. DO NOT activate autofocus unless the material is already placed on the workbed.
- Why Focus Matters: Incorrect focus widens the laser beam, causing less precise cuts (wider kerf) and blurry, less detailed engravings.
|
|
|
3. Ventilation: Ensure your fume extraction system is working properly and vented outdoors. Laser processing wood produces smoke and potentially harmful fumes. Good ventilation also helps reduce charring and flare-ups.
4. Air Assist: Turn on your air assist, which blows a steady stream of air at the laser’s focal point to.
- Clears smoke and debris from the cutting or engraving area.
- Prevents flames and minimizes charring.
- Keeps the laser lens clean.
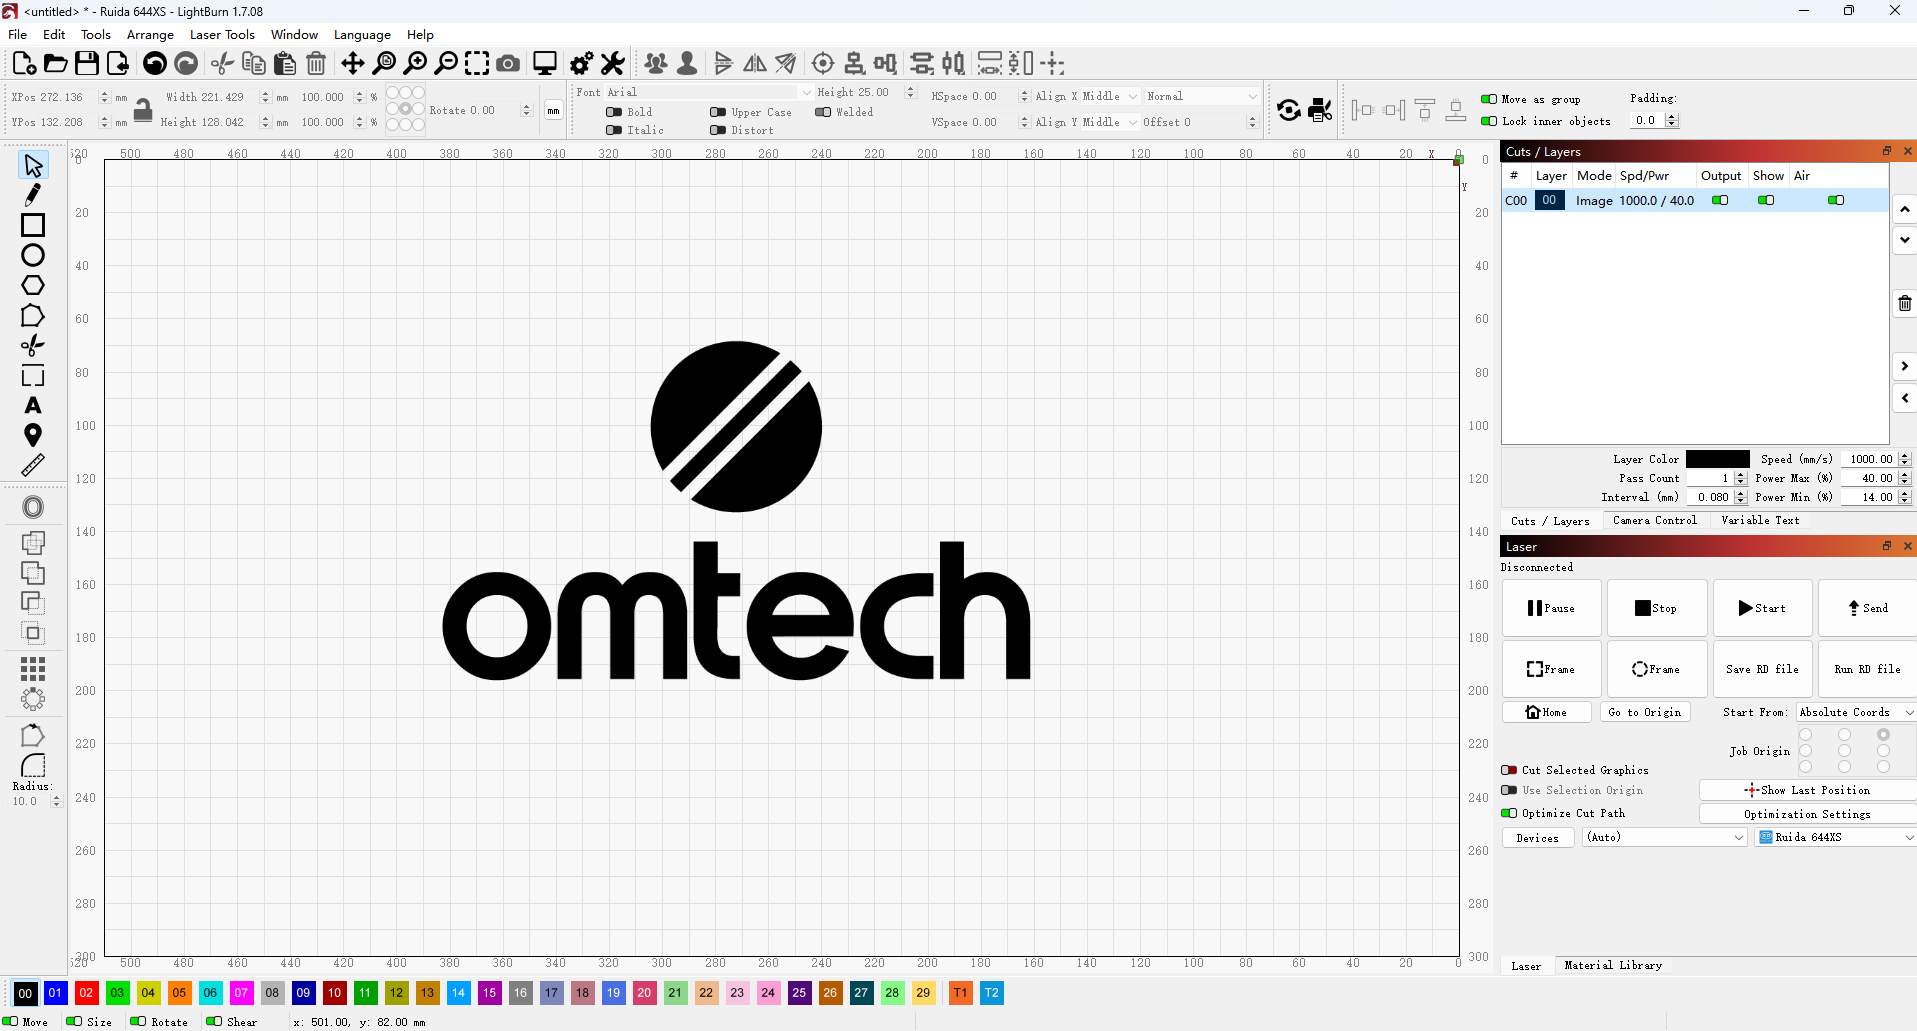
The machine shown in the figures above is the OMTech Pronto 60W.
¶ Step 5: Software Settings
¶ For Engraving (Raster Mode)
- Image Mode/Grayscale Mode: If your laser and software support it (such as LightBurn's "Image" or "Grayscale" modes), use this setting for photographic-style engravings. The laser power adjusts based on the grayscale values of the image—darker areas receive more power for deeper engraving.
- Dithering Mode: If true grayscale isn’t supported or if you prefer a dotted, patterned look, select a dithering algorithm like Floyd-Steinberg or Atkinson. This converts the image into a pattern of black and white dots to simulate shading.
- Power: Set the power level to achieve good contrast without burning too deeply or causing excessive charring. It’s best to start low and gradually increase.
- Speed: Engraving usually runs at higher speeds than cutting. Faster speeds produce lighter engravings, while slower speeds result in darker, deeper marks.
- DPI (Dots Per Inch) / LPI (Lines Per Inch): This controls the resolution of your engraving. Higher DPI or LPI (e.g., 250-600) yields finer detail but takes longer to complete. Lower values create a more pixelated or rustic effect.
Our Recommended Settings for Wood Engraving
✅ Power: 18%
✅ Speed: 400 mm/s
✅ Interval: 0.08 mm
¶ For Cutting (Vector Mode)
- Power: Set the power high enough to cut through the material in one or a few passes. If the power is too low, the laser won’t cut all the way through; if it’s too high, you risk excessive charring or even fire.
- Speed: Cutting speeds are much slower than engraving speeds. Slower speeds allow the laser to dwell longer on the material, resulting in a deeper, cleaner cut.
- Passes: For thicker wood, multiple passes at slightly lower power can help achieve a clean cut without causing excessive charring.
- Cut Order Optimization: When cutting multiple shapes, optimize the cut order in your software to minimize laser head movement and save time. Always cut inner shapes before outer shapes to prevent pieces from falling out or shifting before the inner details are complete.
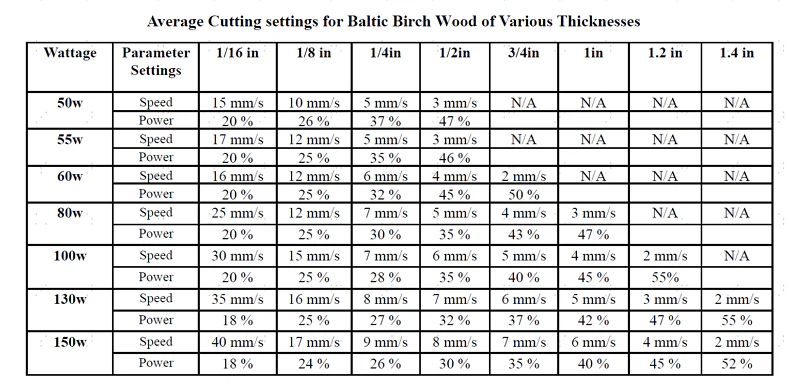
Our Recommended Settings for Wood Cutting
✅ Power: 88%
✅ Speed: 15 mm/s
These settings are provided for your reference to achieve clean, precise cuts on Baltic birch wood.
¶ Step 6: Test Settings
¶ For Engraving
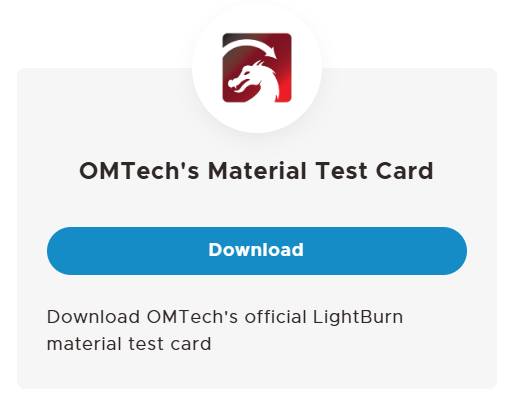
1. Power Scale Test:
- Create a small test grid on a scrap piece of the exact same wood you’ll be using, varying the power and speed settings. This step is essential for finetuning the perfect settings to achieve your desired engraving quality. Keep in mind that engraving results can vary greatly depending on the wood type and settings.
- You can download the test card here.
2. Image Test:
- Engrave a small portion of your actual image on the same wood to check how the details and tones come out.
¶ For Cutting
Draw a few small squares (around 1 inch) on a scrap piece of the same wood. Adjust the power and speed settings until you get a clean, complete cut with minimal charring. Performing this test is crucial to ensure a successful cut.
¶ Step 7: Start Your Project
1. Preview: Use your software’s preview feature to review the laser path and get an estimate of the job’s duration.
2. Send to Machine: Send the job file to your laser machine, ensuring all settings are correct.
3. Monitor: Always stay nearby while the laser is running. Keep an eye out for any unusual flames—small sparks are normal, but large flames are a warning sign. Ensure the workspace is well-ventilated throughout the process.
|
|
|
¶ Step 8: Post Processing
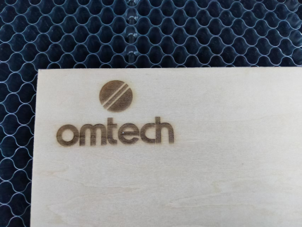
- Post-Engraving Cleaning: After the job is complete, carefully remove the wood from the machine. If you used masking tape, peel it off slowly to avoid damaging the surface. Any remaining soot or residue can usually be cleaned with a soft brush, a damp cloth, or—if the engraving is deep enough—lightly sanded using very fine-grit sandpaper (400-600 grit).
- Post-Cutting Cleaning: Once cutting is finished, remove the cut pieces. If masking tape was applied, peel it off gently. Some charring (kerf) on the edges is normal but can be reduced by finetuning your settings or lightly sanding the edges where accessible. Applying a clear coat or finish will help seal and protect the wood while minimizing the appearance of char.
By following these post-processing steps and taking the time to test your settings on scrap material, you’ll be well on your way to creating beautiful, professional-quality laser-cut and engraved wood projects!