Laser engraving and cutting leather can yield stunning, detailed, and professional results—ideal for creating custom wallets, keychains, patches, jewelry, and more. However, success depends on understanding the unique properties of leather, selecting the right machine settings, and following proper safety precautions.
¶ Step 1: Material Preparation
- Vegetable-Tanned Leather (Veg-Tan): Widely regarded as the best leather for laser processing. It engraves with crisp detail, produces clean cuts, and develops a beautiful patina over time.
- Full-Grain & Top-Grain Leather: These natural leathers also cut and engrave well, offering durability and a premium finish.
- Suede: Can be engraved, but its textured surface may result in less defined engravings and less precise cuts.
- Artificial/Faux Leather (PU Leather): Polyurethane (PU) leather often engraves cleanly and evenly. Never use PVC (polyvinyl chloride) leather—it releases highly toxic chlorine gas when lasered, which is dangerous for health and corrosive to your machine. Always verify the material composition before engraving.
- Avoid Chrome-Tanned Leather: Common in garments, chrome-tanned leather can emit hazardous fumes (including chromium compounds) during laser processing. It’s best to avoid using it altogether.
¶ Step 2: Design Preparation
Use graphic design software such as Adobe Illustrator, CorelDRAW, LightBurn, or Inkscape to create and format your design.
- For Cutting: Create vector paths (thin lines) for all cut lines.
- For Engraving: Use raster images (filled shapes, photos) for engraved areas. Convert text to paths or embed fonts to ensure correct rendering on the laser.
- Clean the Leather: Ensure your leather is free from oils, dirt, and dust. For natural leather, wipe it with a soft, slightly damp cloth. For faux leather, use a mild soap solution—always test in a hidden area first. A clean surface ensures even engraving and cutting.
- Masking (Optional but Recommended): Apply low-tack masking tape (such as painter’s tape or specialized laser masking tape) to the surface where engraving or cutting will occur. Masking can:
- Reduce smoke stains and residue on the un-engraved/uncut areas.
- Minimize charring or scorch marks.
- Provide a crisp edge.
Note: Peel masking tape off immediately after engraving, especially over engraved areas, to prevent residue from sticking. For suede or delicate finishes, test masking on a small area first.
If you're looking for design inspiration, check out our project ideas.
¶ Step 3: Machine Setup and Focusing
Proper machine setup is essential for safety and achieving clean, precise results.
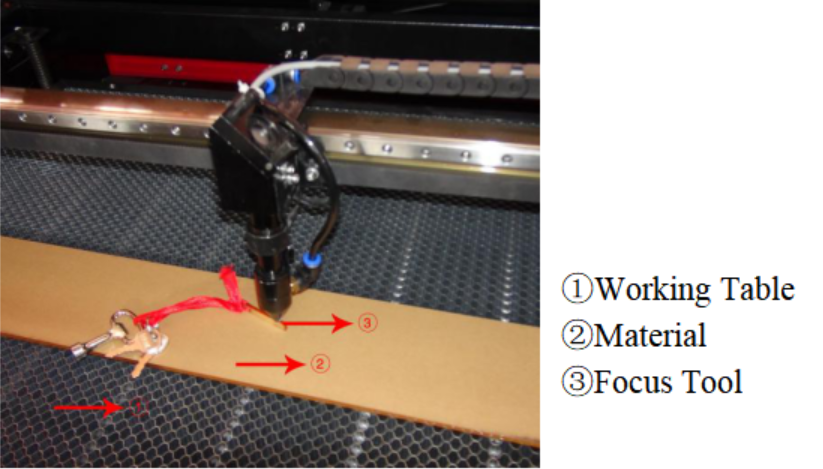
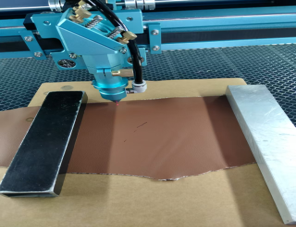
- Position the Material: Place the leather flat on the laser bed. Use honeycomb pins, clamps, or magnets to hold it securely in place, preventing movement or warping during processing.
- Focus the Laser (this step is crucial):
- Manual Focus: Use your machine’s focus tool (such as an acrylic gauge) to set the exact distance between the laser head and the leather surface.
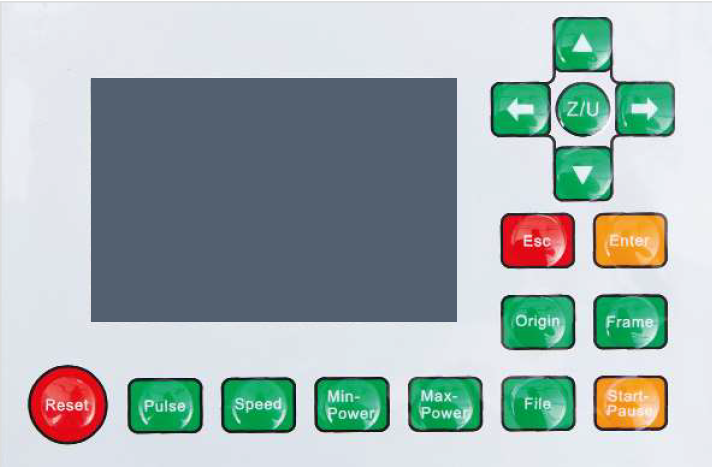
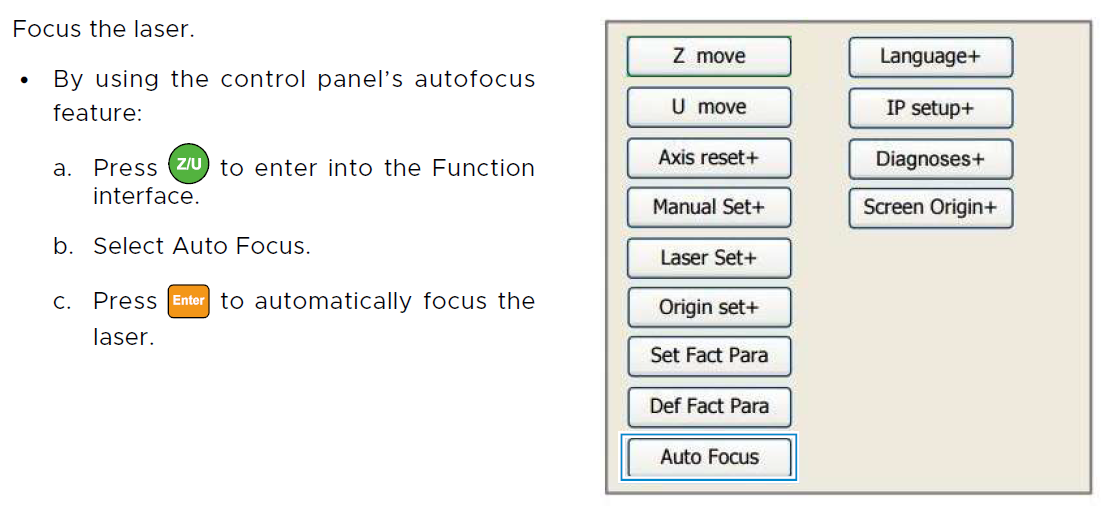
- Autofocus: If your machine has an autofocus feature, activate it through the control panel or software. Follow the on-screen instructions or the guide below. DO NOT activate autofocus unless the material is already placed on the workbed.
- Importance: An out-of-focus laser produces blurry engravings and wide, uneven cuts.
|
|
|
- Ventilation: Leather processing generates a strong burnt-hair odor, along with significant smoke and fumes. Use a powerful fume extraction system vented directly outdoors. Good airflow also helps reduce surface charring.
- Air Assist: Turn on your air assist, which blows a steady stream of air at the laser’s focal point to.
- For Cutting: Clears molten material and debris, cools the cut path, and reduces charring or flare-ups.
- For Engraving: Removes smoke and vaporized particles, preventing residue from settling on the leather and causing discoloration or "ghosting".
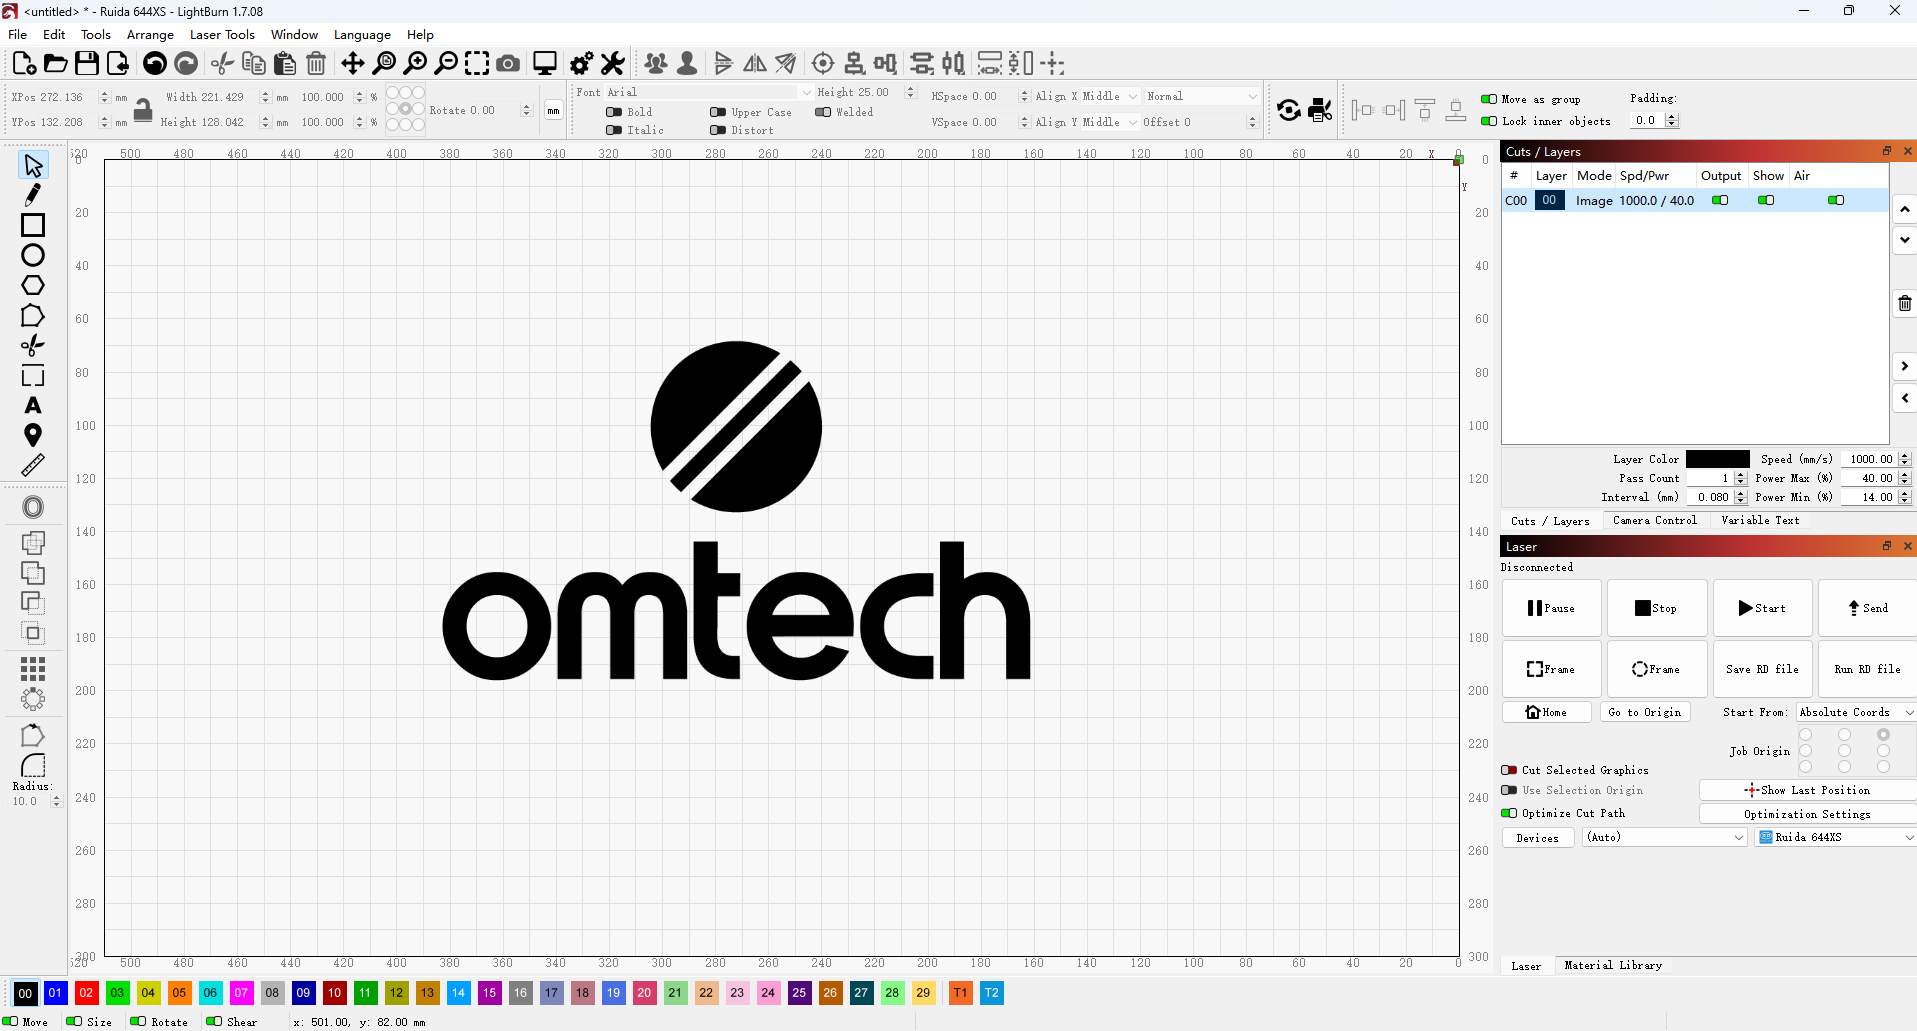
For this guide, we use the OMTech Pronto 60W CO2 laser machine to cut and engrave leather.
¶ Step 4: Software Settings
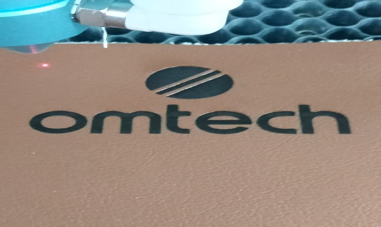
¶ For Engraving (Raster Mode)
- Power: Start with low to medium power—leather engraves easily. Too much power can burn too deep, making the surface brittle, weakening the material, or even cutting through it.
- Speed: Use medium to high speed. Higher speeds produce lighter engravings; slower speeds create darker, deeper marks.
- Grayscale vs. Dithering
- Grayscale Mode: If your software and machine support variable power (dynamic power modulation), you can achieve smooth tonal transitions in photographic engravings.
- Dithering: The most common method—images are converted into patterns of black and white dots to simulate shades of gray. Try different algorithms (e.g., Floyd–Steinberg, Atkinson) to see which works best with your specific leather.
Our Recommended Settings for Leather Engraving
✅ Power: 15%
✅ Speed: 200 mm/s
✅ Interval: 0.08 (mm)
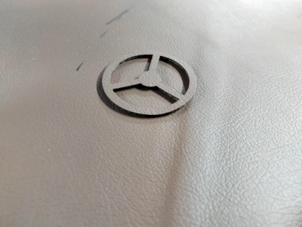
¶ For Cutting (Vector Mode)
- Power: Cutting requires more power than engraving. Aim for a clean, single-pass cut.
- Speed: Use a slow to medium speed. If it’s too fast, the laser won’t cut through completely; too slow, and you’ll get excessive charring.
- Cut Order Optimization: When cutting multiple shapes, process internal holes or details first, then cut the outer perimeter last. This keeps the material stable until all internal cuts are complete.
- Dampening Leather (Optional): Slightly dampening vegetable-tanned leather before cutting may help reduce charring. However, this requires careful testing and thorough drying afterward to avoid warping or damage.
Our Recommended Settings for Leather Cutting
✅ Power: 50%
✅ Speed: 50 mm/s
¶ Step 6: Test Settings
1. Test Engraving
- Always run a test engraving on a small, inconspicuous scrap of the same leather you’ll be using. Create a test grid with different power and speed settings to determine the ideal depth, contrast, and overall finish.
- You can download the test card here.
2. Test Cutting
- Always perform a test cut on a scrap piece of the same leather. Cut a small square or circle, then adjust power, speed, and frequency until you achieve a clean, single-pass cut with minimal edge charring.
¶ Step 7: Start the Project
Preview your job in the software. Send it to the machine. Stay with the machine and monitor the process.
|
|
|
¶ Step 8: Post Processing
¶ Post-Engraving Cleaning
After engraving, gently clean the leather.
- Remove Masking: Carefully peel off any masking tape used during engraving.
- Wipe Residue: Gently brush away loose soot or debris with a soft, dry brush or microfiber cloth.
- Damp Cloth (Optional): For stubborn residue, lightly dampen a cloth with a small amount of leather cleaner, saddle soap, or a 50/50 mixture of rubbing alcohol and water. Always test cleaners on a hidden area first. Gently wipe the engraved area without saturating or scrubbing harshly to avoid blurring the design.
- Conditioning: After cleaning, apply a leather conditioner to restore moisture and protect the leather.
¶ Post-Cutting Cleaning
Remove cut pieces and peel off any masking tape. Any charring on the cut edges (kerf) can be lightly sanded with very fine-grit sandpaper or gently wiped with a damp cloth and leather cleaner.
By carefully following these steps and prioritizing safety, you can consistently create stunning, professional-quality laser-engraved and cut leather products.