Laser engraving and cutting acrylic is a popular method for creating custom designs, signs, and intricate parts. Acrylic, also known as Plexiglas or PMMA, is a thermoplastic that responds exceptionally well to CO2 lasers. Follow these steps to achieve the best results with your acrylic projects.
¶ Step 1: Design Your Project
This is where your vision comes to life. Use graphic design software to create the pattern or text you want to engrave or cut.
- Software: Popular options include vector-based programs like Adobe Illustrator, CorelDRAW, Inkscape, as well as laser-specific software such as LightBurn and RDWorks.
- Vector vs. Raster:
- Vector designs (lines and curves) are ideal for cutting and vector engraving. The laser follows these lines to cut through or score the material.
- Raster designs (images, photos, and solid fills) are used for engraving. The laser moves back and forth, firing dots like a printer to produce shaded images.
- File Formats: Save your designs in formats compatible with your laser software—common vector formats include .dxf, .ai, .svg, .cdr, and .eps; raster formats include .jpg, .png, and .bmp.
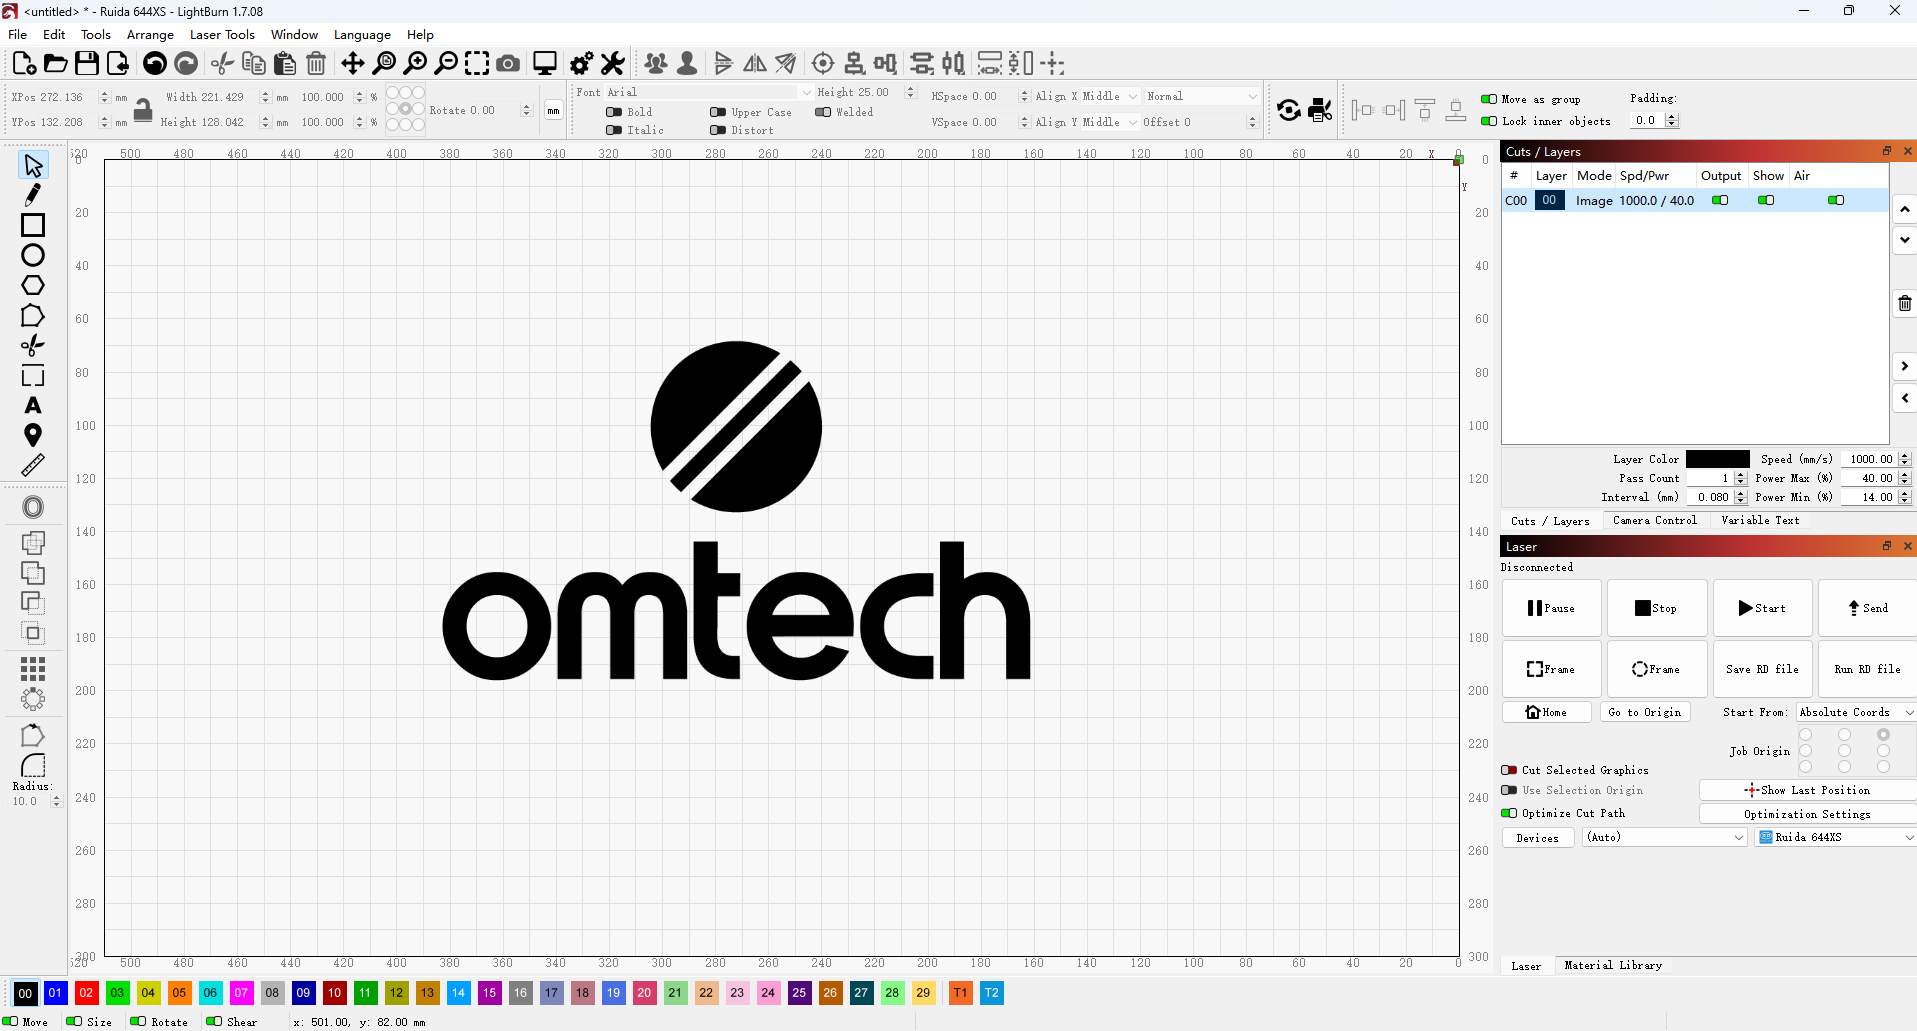
For this project, we use LightBurn to create our pattern. For more inspiration, check out our project ideas!
¶ Step 2: Prepare Your CO2 Laser Machine
Before you begin, set up your machine and prepare your acrylic material properly.
- Ventilation: Make sure your exhaust system is connected and working effectively. Cutting acrylic produces fumes that need to be safely vented outside or filtered through a reliable system.
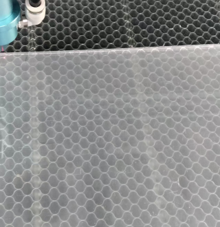
- Laser Bed: Use a honeycomb bed or stand-offs in your laser’s work area. Elevating the acrylic helps prevent flashback (laser reflections damaging the underside) and ensures proper airflow during cutting.
- Secure the Material: Lay the acrylic sheet flat on the laser bed and secure it to prevent any movement during the job. Clamps or magnets work well—but note, these are usually not included.
- Protective Film: Acrylic sheets often come with a protective film on one or both sides.
- For Engraving: Remove the film on the side you plan to engrave. You can leave the film on the opposite side to protect against scratches or flashback marks.
- For Cutting: It’s generally best to remove the film from both sides to reduce fire risk. However, if you want to keep it on to prevent scratches, be sure to use cutting speeds and power settings that minimize ignition.
- Focus the Laser: Proper focus is key to sharp engravings and clean cuts. Use your laser’s autofocus feature or manually adjust the focus height following your machine’s instructions. Incorrect focus results in blurry engravings or incomplete cuts.
For this guide, we use the OMTech Pronto 60W CO₂ laser machine to cut and engrave acrylic.
¶ Step 3: Set Laser Parameters
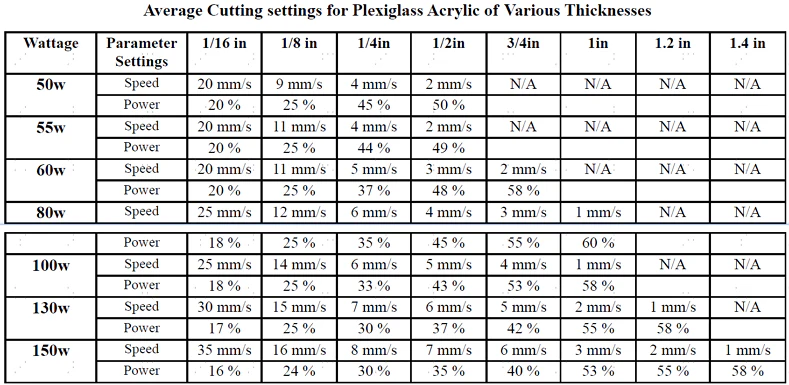
This is the most critical step for achieving high-quality results while avoiding issues like melting or uneven cuts. Your settings will depend on your laser’s power (wattage), the type of acrylic you’re using (cast vs. extruded), and the material’s thickness.
- Acrylic Types:
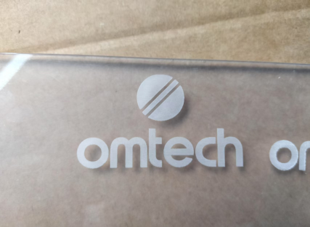
- Cast Acrylic: Ideal for engraving, it produces a frosted, white, textured finish that stands out beautifully. It also cuts cleanly and consistently.
- Extruded Acrylic: Engraves with a clear or transparent finish, less frosted than cast acrylic. It’s excellent for cutting, often yielding smooth, flame-polished edges. However, it’s more prone to melting if settings aren’t carefully adjusted.
- Power: Adjust your laser’s power based on the desired depth. Higher power delivers deeper engraving or faster cutting at the same speed.
- Speed: Control how fast the laser head moves. Slower speeds allow the laser to stay longer on the material, resulting in deeper cuts or engravings.
- Resolution/LPI (for engraving): For raster engraving, Lines Per Inch (LPI) controls the level of detail.
Higher LPI means more detail, but it also increases engraving time and heat buildup. For most projects, the machine’s default LPI setting works well and usually doesn’t need adjustment.
If you want finer, more detailed engravings, try lowering the LPI slightly below the default. Conversely, increasing it can speed up the job but may reduce detail.
- Air Assist: Always use an air assist when cutting or engraving acrylic. It helps blow away smoke and debris, preventing flames and reducing scorching. This results in cleaner cuts and sharper engravings.
¶ Step 4: Run a Test (Recommended)
Before starting your final project, perform a small test cut or engraving on a scrap piece of the same acrylic. Use the results to finetune your settings until you achieve the perfect depth, clean cut, and desired engraving finish.
¶ Step 5: Start Your Project
Once you’ve optimized your settings and prepared your material, you’re ready to begin.
- Initiate: Send the job to your laser engraver from your software.
- Monitor: Stay close and supervise the machine throughout the entire process. Watch carefully for any signs of excessive melting, charring, or flames. Never leave the laser unattended.
- Ventilation Check: Ensure the exhaust system is running continuously and effectively removing fumes.
Our Recommended Settings for Acrylic Engraving
✅ Power: 14%
✅ Speed: 200 mm/s
✅ Interval: 0.08 mm
Our Recommended Settings for Acrylic Cutting
✅ Power: 88%
✅ Speed: 8 mm/s
|
|
|
¶ Step 6: Post Processing
After the laser job is complete, some final touches may be needed:
- Clean-up: Gently wipe away any smoke residue or dust using a soft cloth and an acrylic-safe cleaner.
- Peel Protective Film: Remove any remaining protective film from the acrylic surface.
- Inspect: Carefully check your finished piece for quality, ensuring the cuts are clean and the engravings are consistent.
By following these steps, you’ll be able to laser engrave and cut acrylic with precision, bringing your creative designs to life!