This article aims to adjust the machine settings so that the computer can still access the internet while connected to the machine via WiFi or Ethernet, suitable for the following models:
✅ Polar 50W
✅ Polar+55W
✅ Polar Lite
✅ Pro Series
Depending on the status of your machine, it may take about 10 minutes to complete the process.
¶ Steps
- Ensure your computer is connected to the machine via Ethernet cable or Wi-Fi.
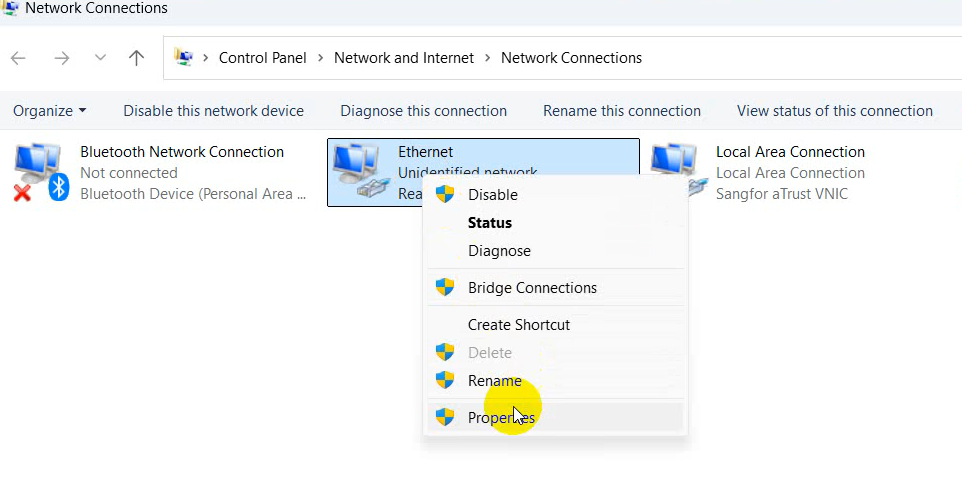
- Open the Network Connections interface, right-click the corresponding adapter, then select Properties.
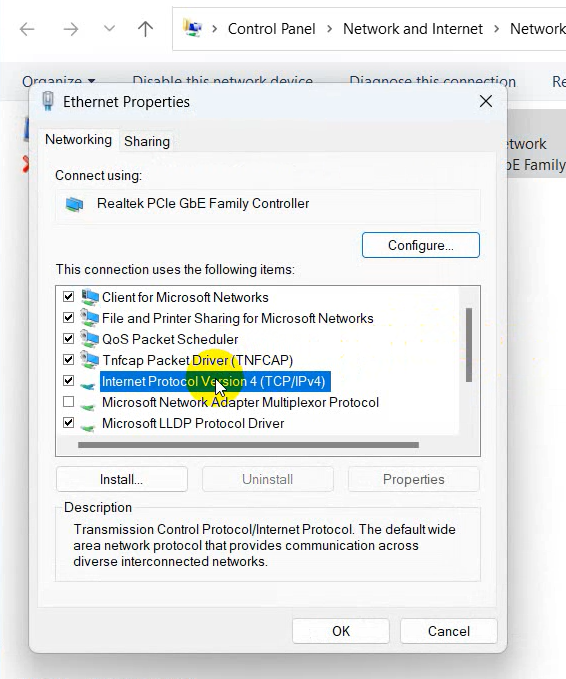
3. Double-click Internet Protocol Version 4 (TCP/IPv4).
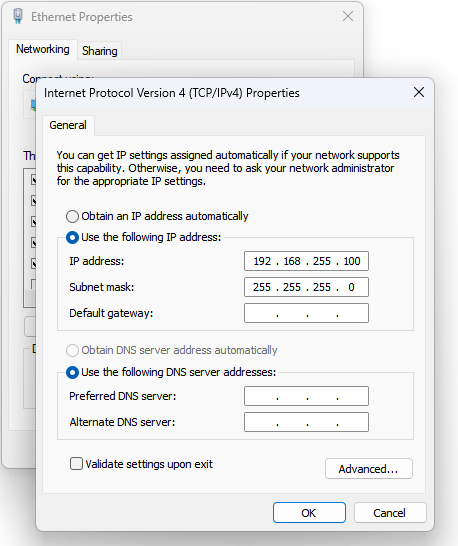
4. Set the IP address to 192.168.255.100. The subnet mask will be generated automatically.
5. Click OK to close the settings window.
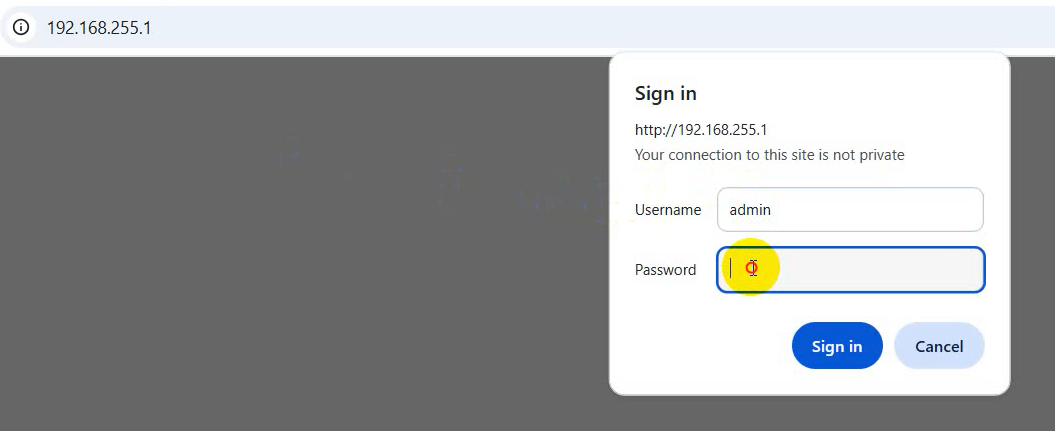
6. Open your web browser and enter 192.168.255.1 in the address bar.
7. Sign in with the username: admin and password: admin, then click Sign in.
Note: If you cannot access the web interface, hold the reset button on the machine’s router for 10 seconds to reset it.
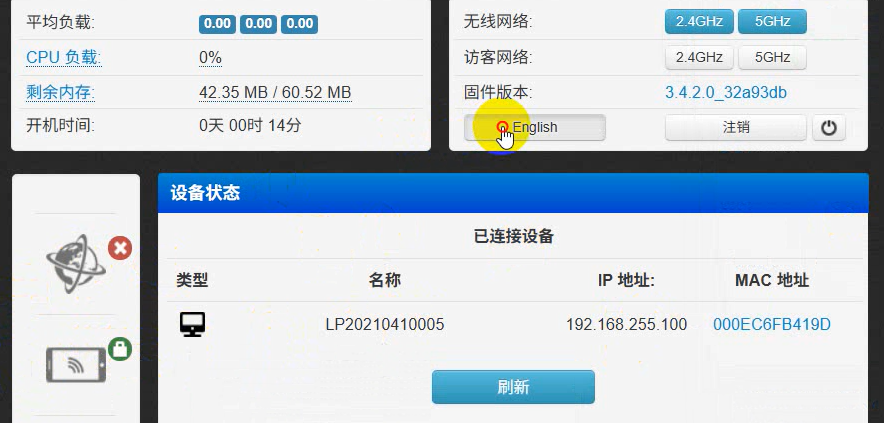
8. Click English to switch the interface language.
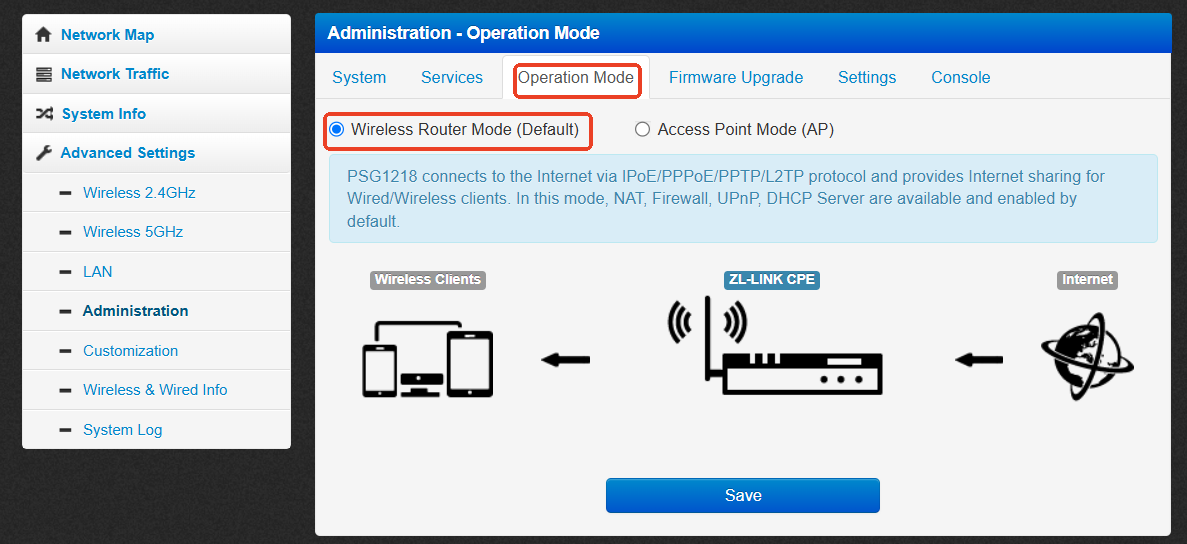
9. Click Administration, change Operation Mode to Wireless Router Mode, then click Save.
Note: The router will take a moment to switch modes. Do not close the page.
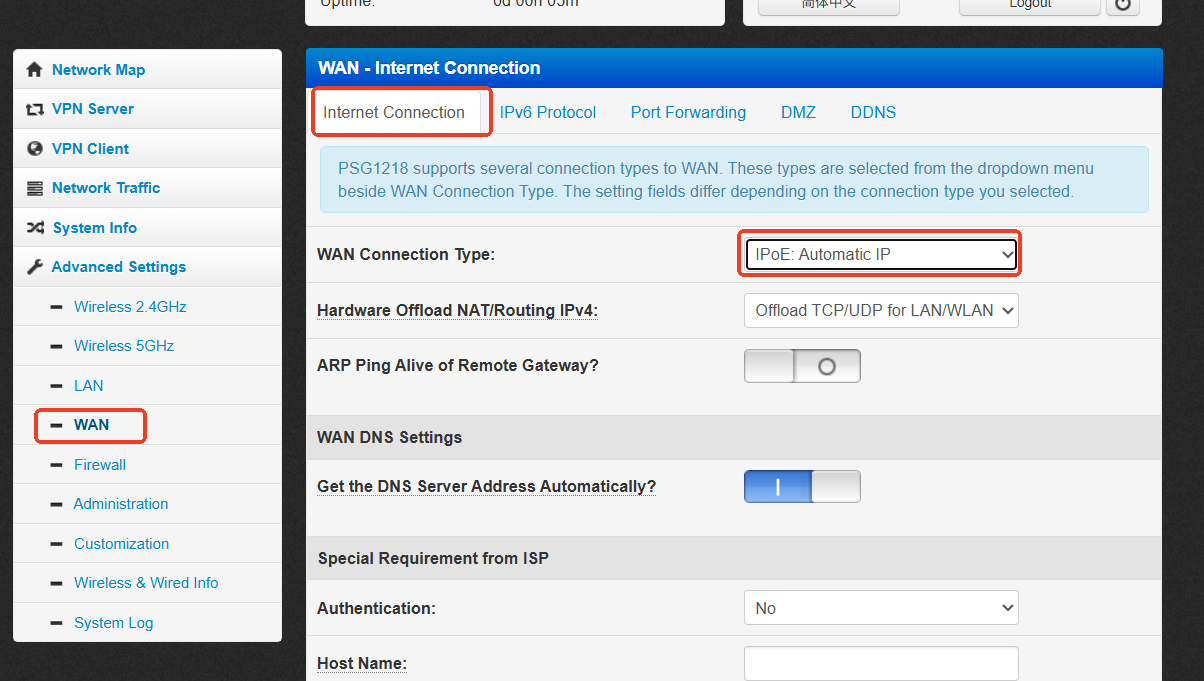
10. Click WAN, set WAN Connection Type to IPoE: Automatic IP, then enable the option Get the DNS Server Address Automatically.
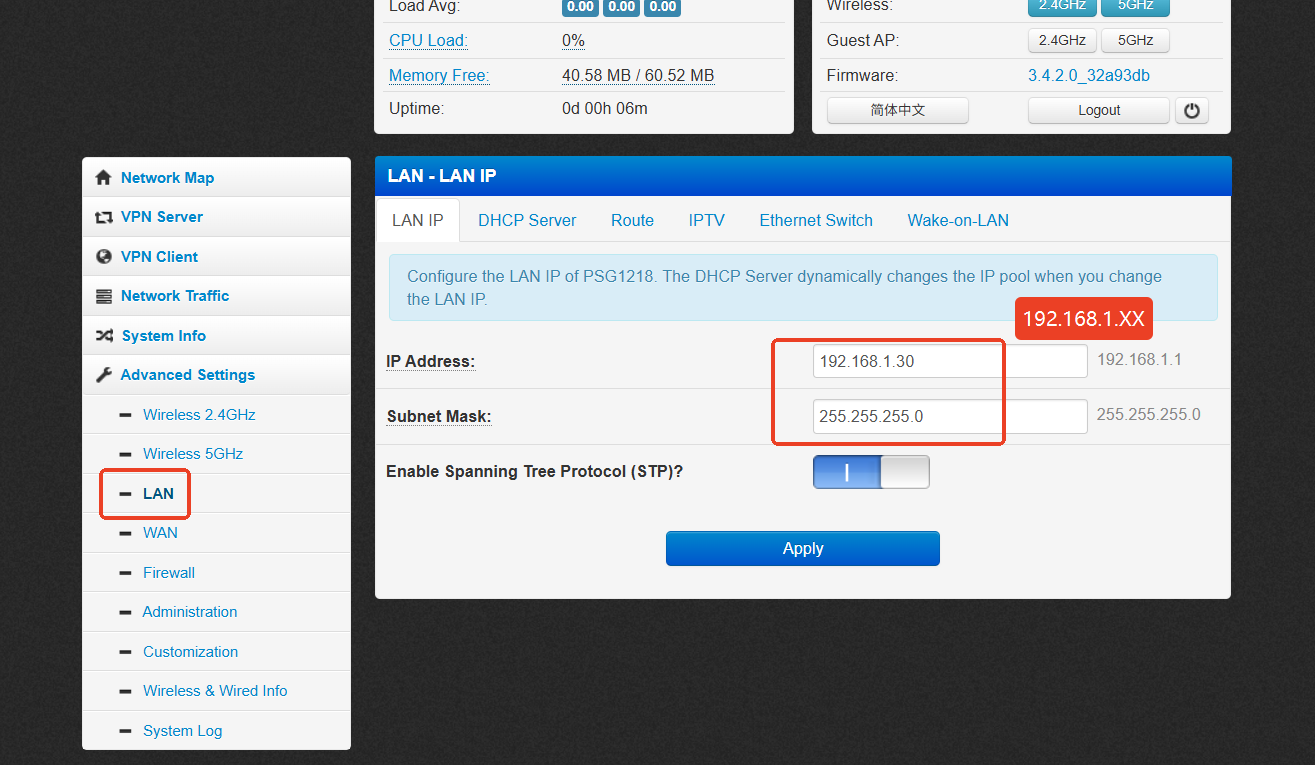
11. Click LAN, set the IP address to 192.168.1.30 and the subnet mask to 255.255.255.0, then click Apply.
The browser disconnects from the router’s web interface.
Note: The IP address must be in the same subnet as the engraving machine. For example, if the machine's IP address is 192.168.1.100, set your IP address to 192.168.1.xx, where xx cannot be 100.
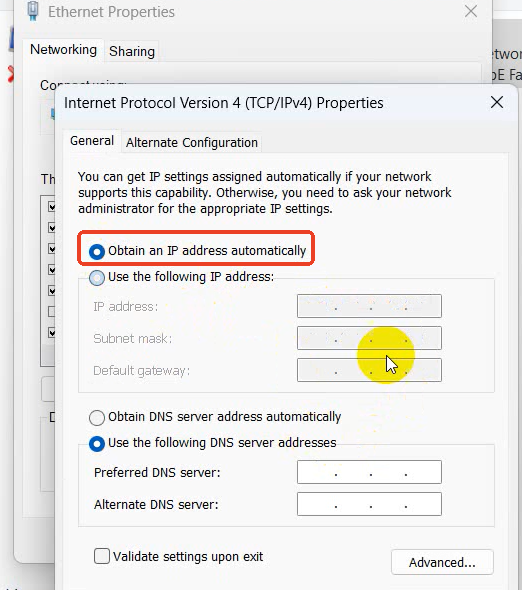
12. Return to the Network Connections interface and set IPV4 to Obtain an IP address automatically.
13. Open your browser and enter the new IP address 192.168.1.30 to access the web interface again.
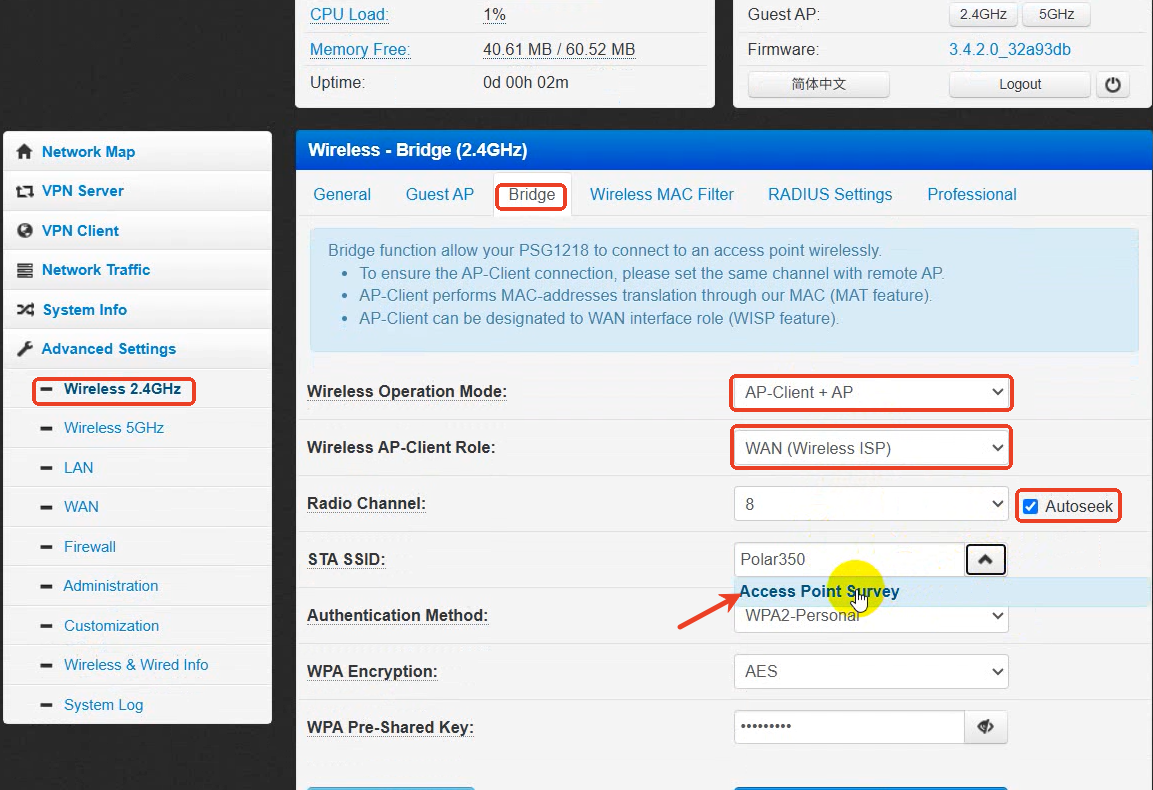
14. Click Wireless 2.4GHz, then select Bridge.
15. Change Wireless Operation Mode to AP-Client + AP, set Wireless AP-Client Role to WAN, and enable Autoseek.
16. Click Access Point Survey to search for your Wi-Fi network, then enter the password (skip this step if using an Ethernet cable).
17. Click Apply. The router is now successfully connected to your Wi-Fi network.
18. To connect to the home network via Ethernet, connect the LAN port of the home router to the WAN port of the machine's router using an Ethernet cable as shown below.
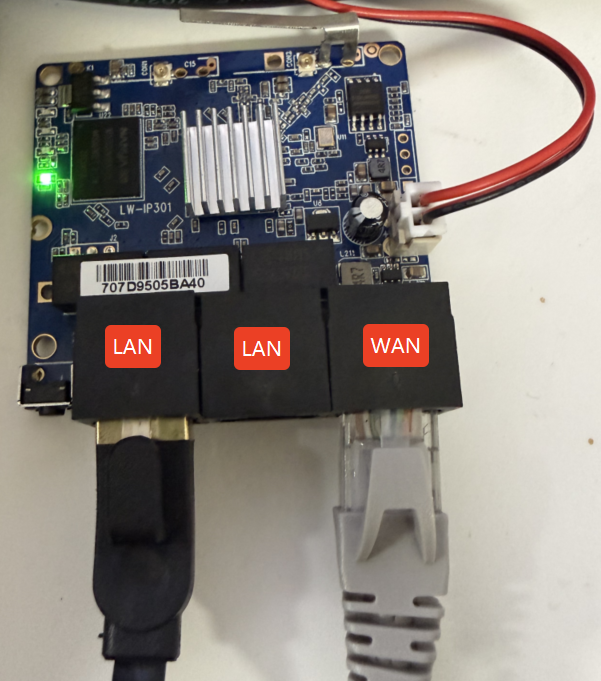
19. The engraving machine's mainboard should be connected to a LAN port on the machine's router. If the computer is also connected via an Ethernet cable, it must also be plugged into a LAN port on the machine's router.
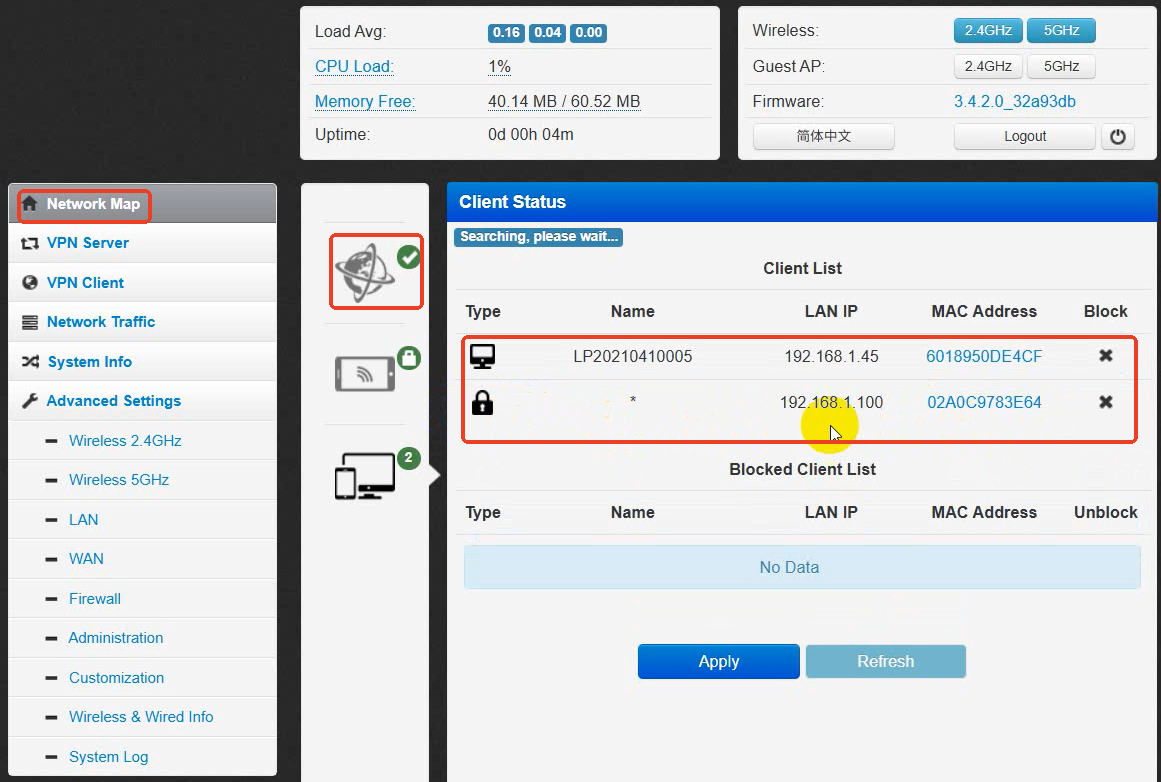
20. Click Network Map to view the current network connection status. Under the list of connected devices, you can check which devices are currently connected to the machine's router.