This article introduces the beam alignment setup for your OMTech Maker CO₂ Laser Engravers, covering the required tools, necessary settings, and instructions for aligning your laser beam mirrors.
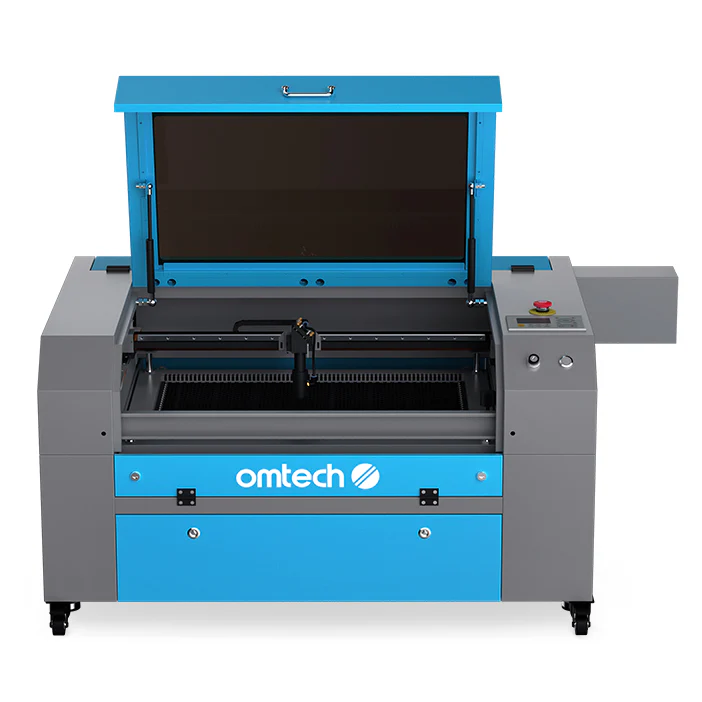
Here is the model we used for demonstration in the video.
¶ Tools You Will Need
- Masking Tape
- 8 mm Wrench
¶ Before You Start
Warning! Please follow these safety instructions before or during alignment:
- ALWAYS wear safety goggles and gloves.
- Avoid attaching the tape directly to any mirrors.
- Set Max Power (not Min) to 14% or lower using the control panel to mark the tape without igniting it.
It is recommended starting from 5% and increase 1% at a time until the pulse products a mark on the tape. - Keep the laser path clear of obstructions.
- Close the cover before firing the laser.
- DO NOT look at the active laser through the cover.
¶ Video Tutorial
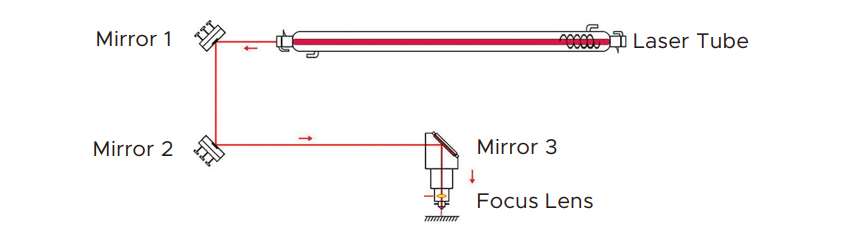
The picture below illustrates how the laser path goes.
Click the video to learn how to adjust the beam from the very beginning:
https://youtu.be/M4dTrA25Qm0?si=QpYhb9T10EelREY
✅ Focus on Consistency: When aligning Mirror 1 to 2 and Mirror 2 to 3, the dot does not need to be perfectly centered in the guide hole. But the marks at both near-end and far-end must stay within the border and hit the same spot consistently with each pulse.
¶ Setscrew Adjustment on the Mirror Mount
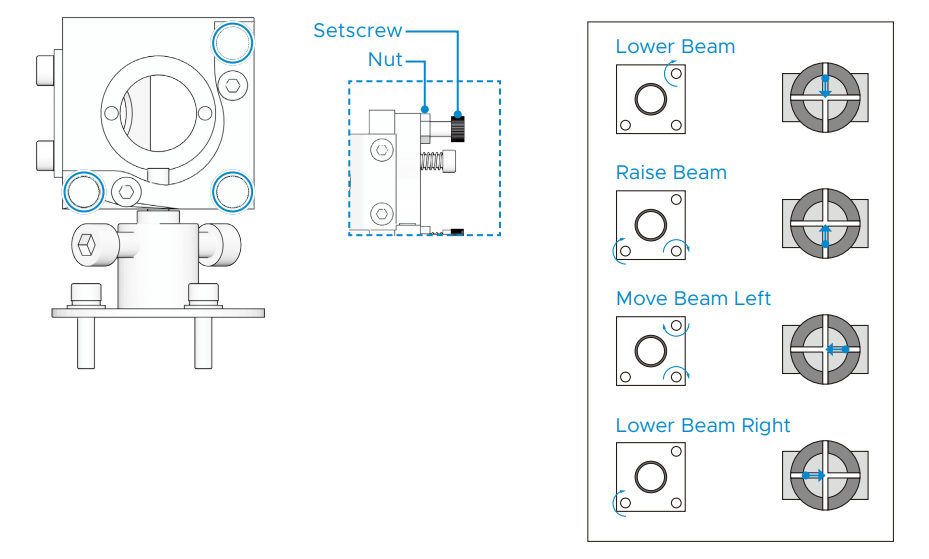
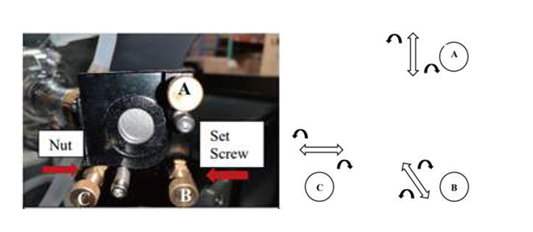
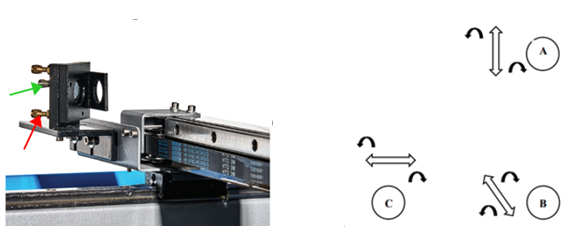
Align the laser beam from the laser tube to Mirror 1, then to Mirror 2, following the steps in the video tutorial. For setscrew adjustment details, refer to the pictures below.
For Mirror 1 and Mirror 2:
▸ Cooper Screws: Mirror Setscrew
▸ Black Frame: Mirror Frame
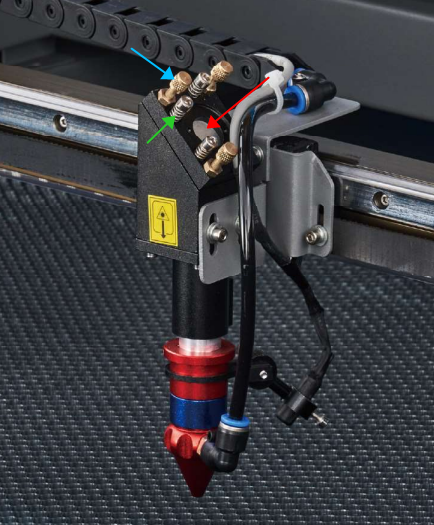
For Mirror 3:
▸ Blue arrow: Mirror 3 setscrew (shown in the left picture)
▸ Green arrow: Mirror 3 frame (shown in the left picture)
▸ Red arrow: Mirror 3 (shown in the left picture)
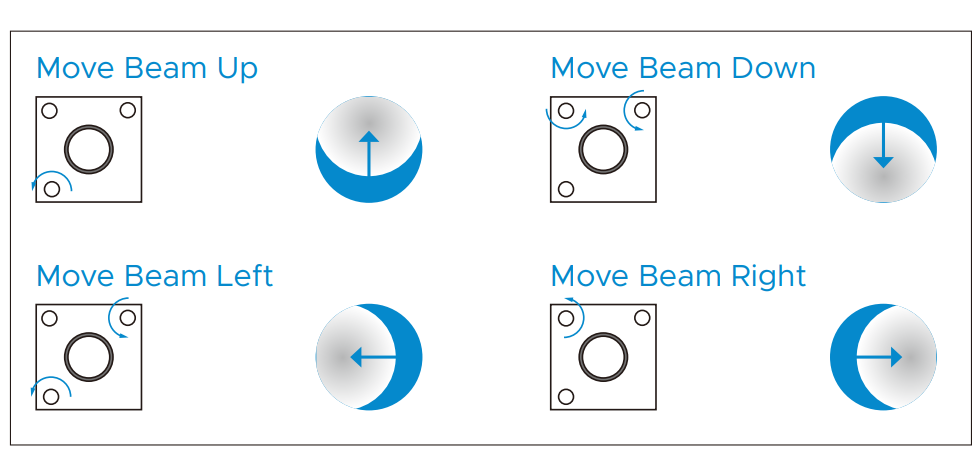
▸ Screw Direction & Dot Movement (shown in the right picture)
Note:
⚠️1. Avoid Diagonal Screws: Use the diagonal mirror screw only if the standard screws (up/down or left/right) cannot move the dot closer to the center.✅2. Combine for Linear Movement: Turn the diagonal screw together with a standard screw (up/down or left/right) if needed. This moves the dot in a straight line (vertical or horizontal).
⚠️3. Hold Screws Stable: When tightening the retaining nuts, hold each setscrew firmly in place to prevent screw movement.
🔄4. Adjust – Pulse – Check:
a.Make micro-adjustments (≤⅛ turn).
b.Briefly pulse the laser.
c.Check the dot's position on the tape.
d.Repeat the steps as necessary.
¶ Mirror 3 to Workbed Laser Beam Alignment
The burn mark on the tape at the nozzle tip should be perfectly centered. If not, adjust Mirror 3.
To align the laser beam from Mirror 3 to the workbed:
Step 1. Disconnect the air assist hose. Firmly apply tape over the laser head aperture to create a visible ring imprint.
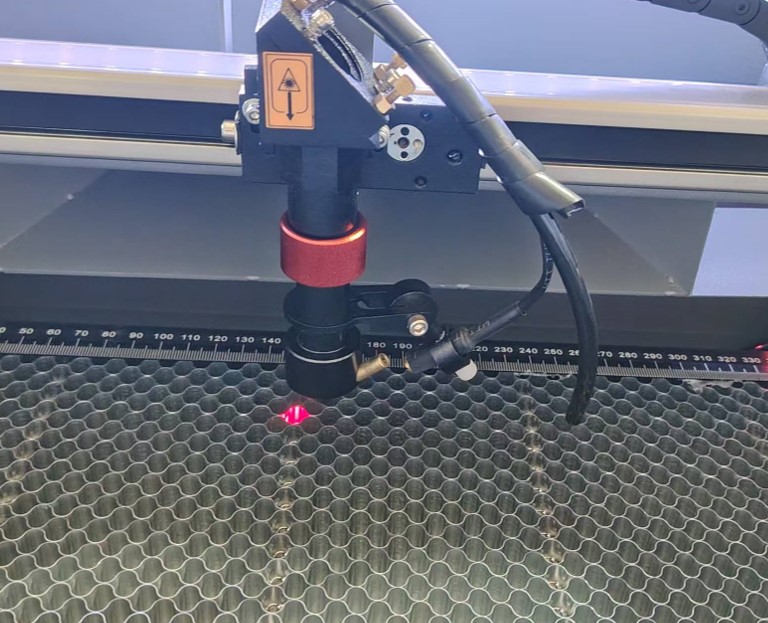
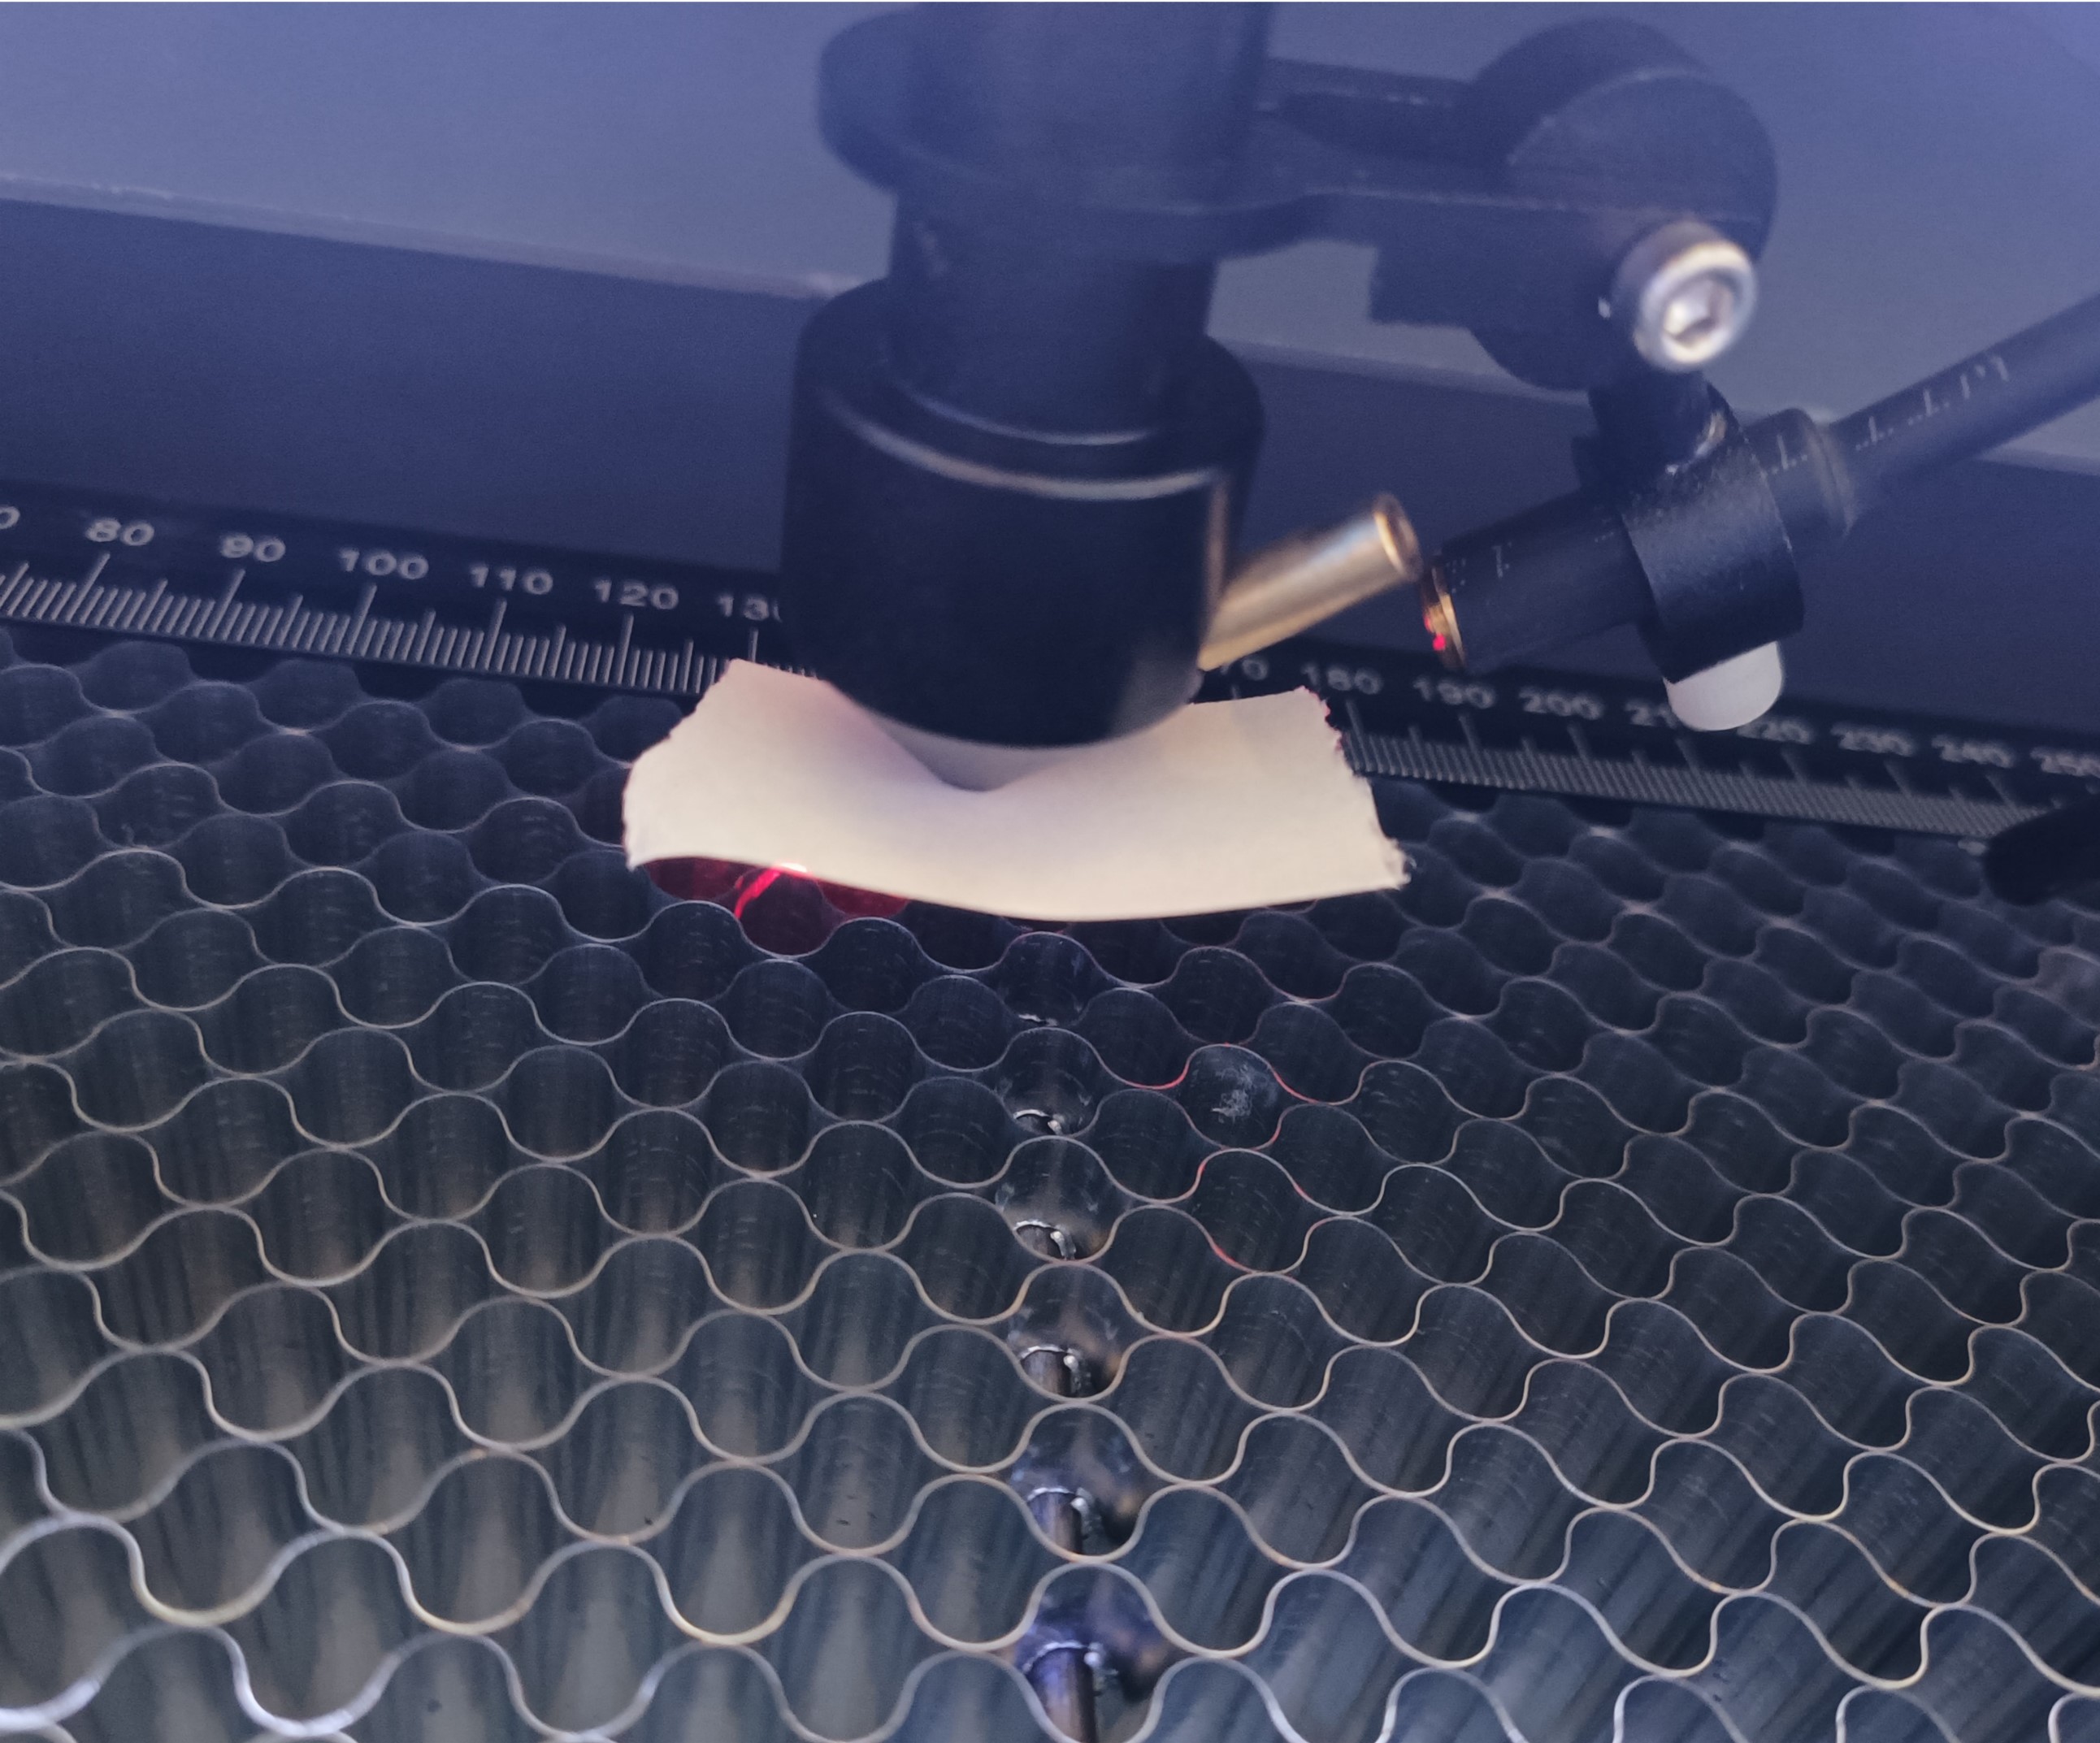
Step 2. Set Max Power to 14% or lower. Fire the laser briefly by pressing the pulse button.
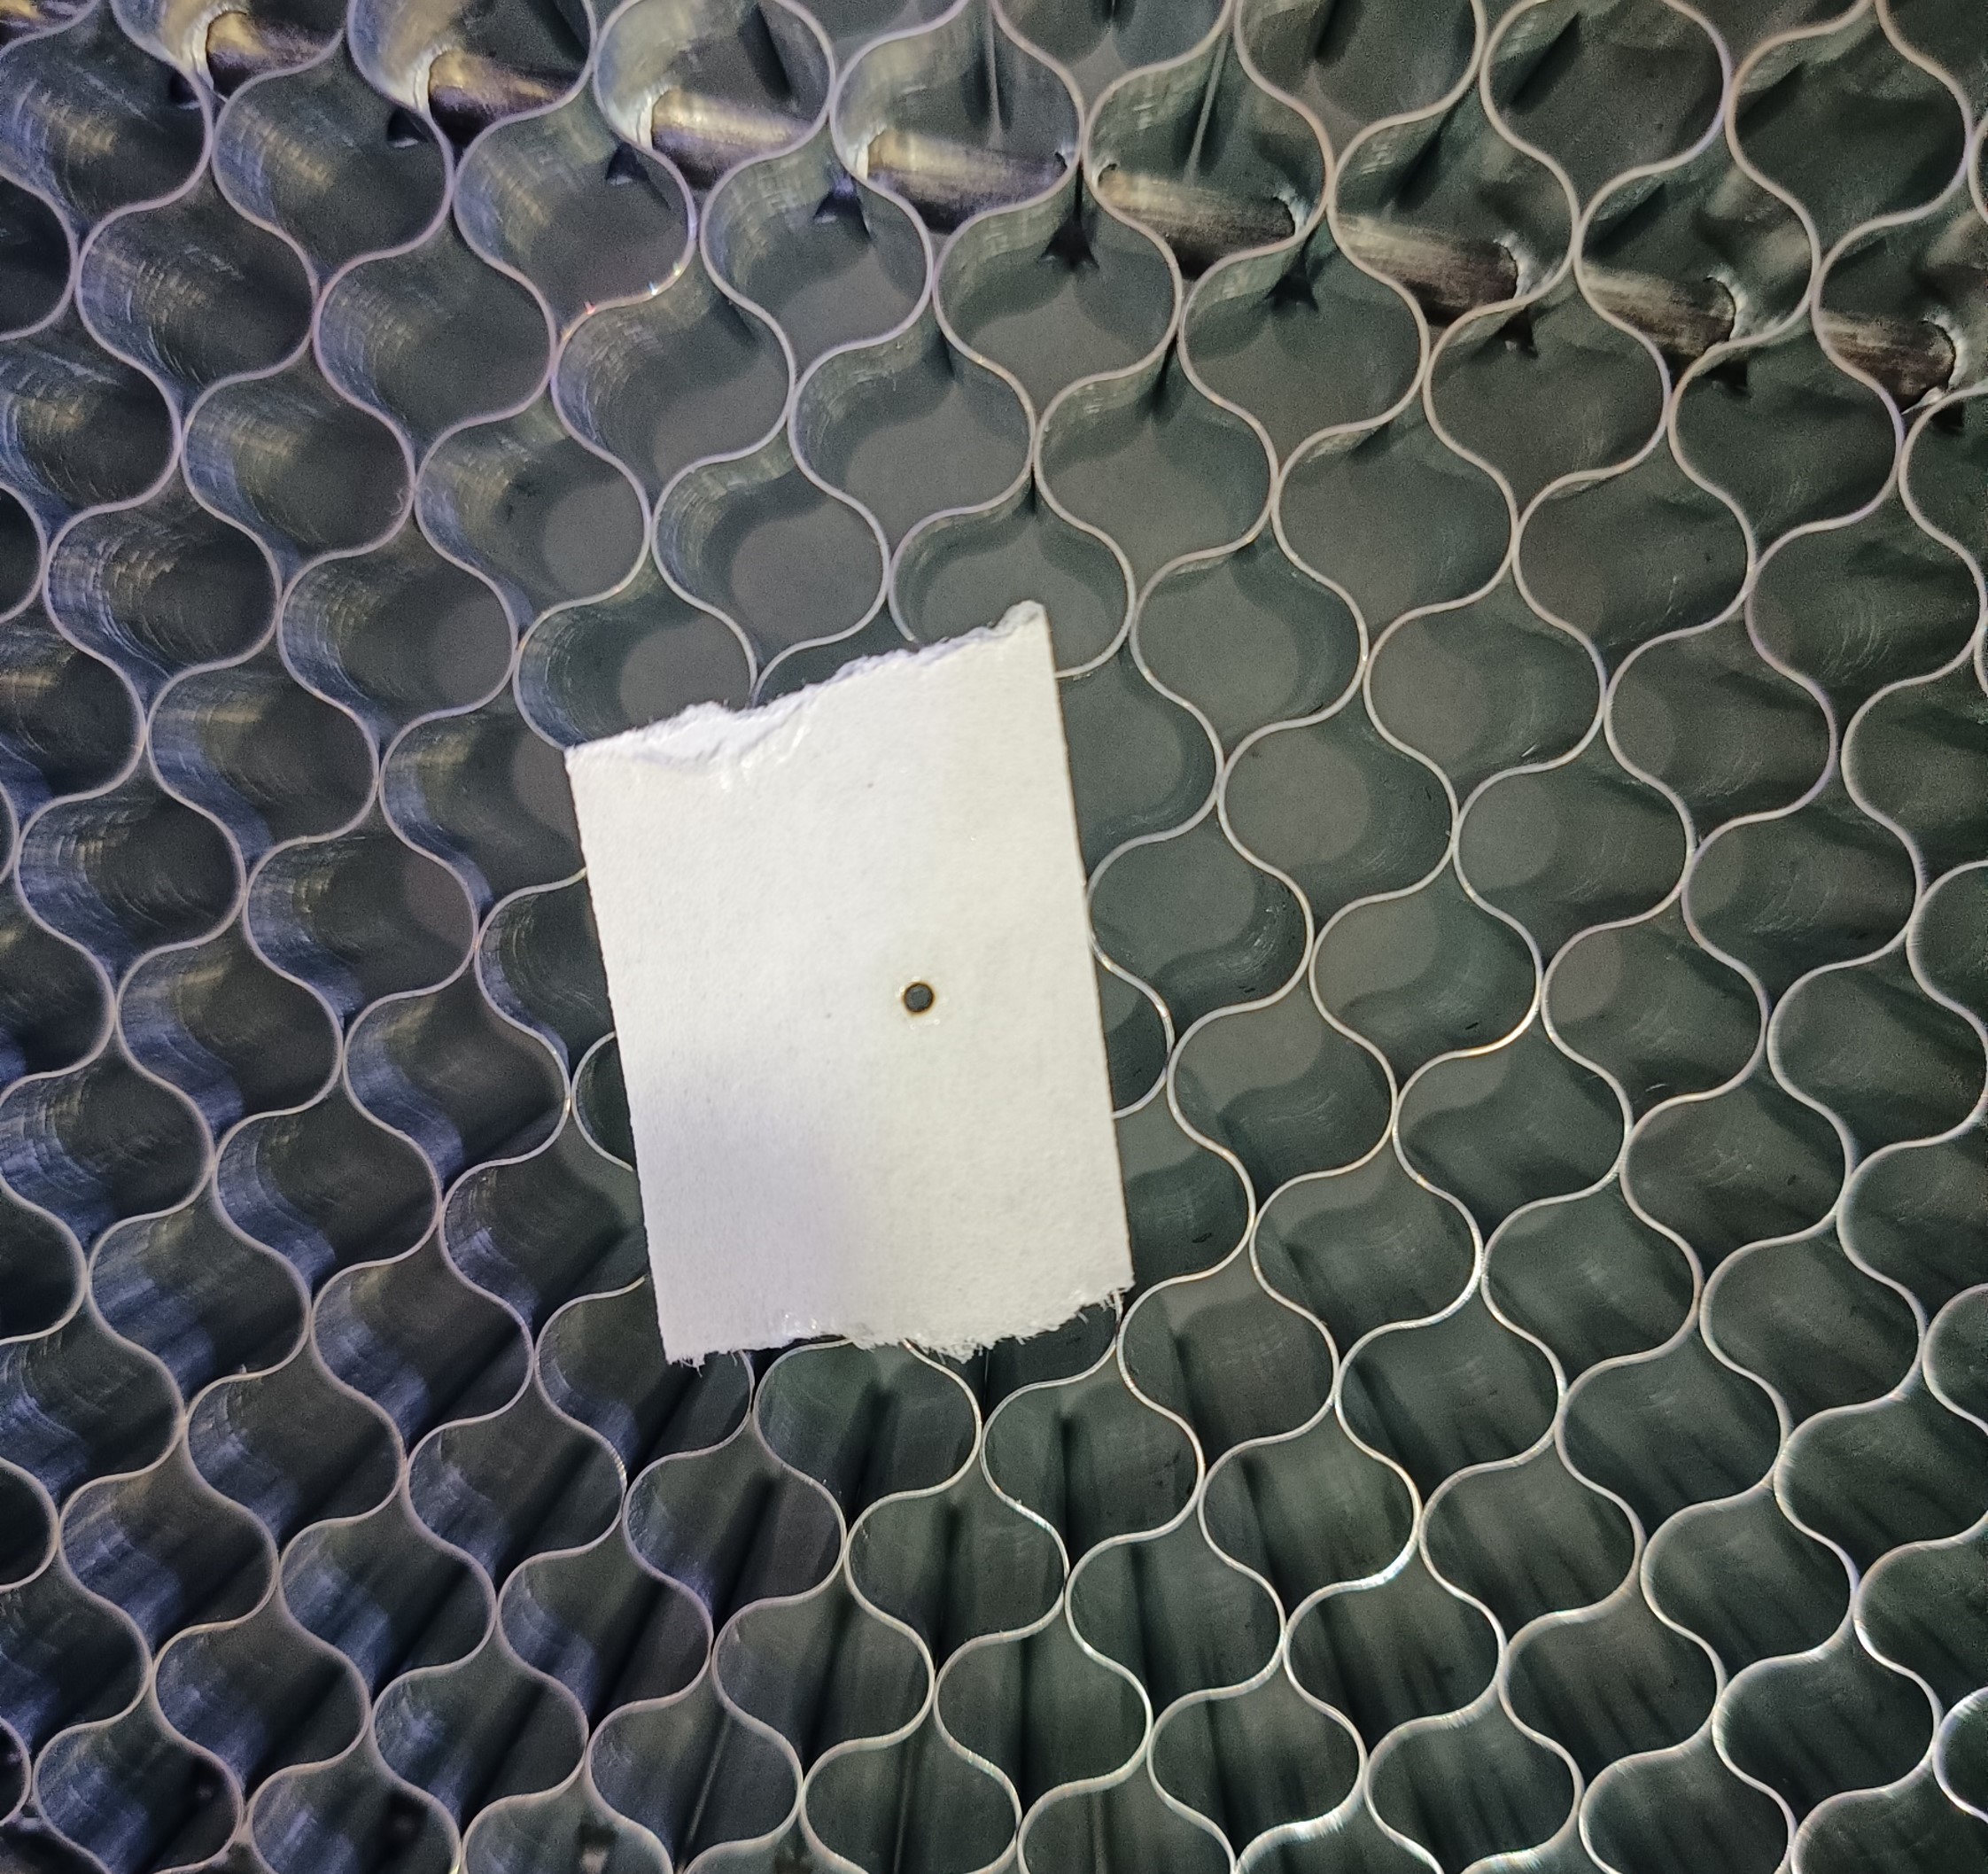
Step 3. Observe the position of the burn mark and the ring.
✅ Centered hole: Alignment from Mirror 3 to the workbed is complete.
❌ Off-center: Proceed to Step 4 to adjust Mirror 3.
Step 4. To adjust Mirror 3 by turning the setscrews accordingly:
✅ a. Loosen the nut on the setscrew.
✅ b. Turn the setscrew slightly (no more than ⅛ turn) in either direction. Keep track of which setscrew you adjust and the turning direction.
✅ c. Test the burn mark position after each adjustment to observe the effect.
🔁 d. Continue adjusting and testing until the burn mark is perfectly centered in the ring.
✅ e. Tighten the nut on the setscrew.